
How to Clean a Microwave: Your Step-By-Step Guide
MARCH 13, 2025 | Home Care Buzz Experts | 5 minute read
Microwaves make cooking and heating food easier, but spills and splatters can build up fast. Leftover food and stuck-on messes can lead to bacteria growth, lingering odors, and can even affect how your food tastes.
The good news? Cleaning your microwave regularly and keeping it fresh and ready for your next meal doesn’t have to be a big chore. In fact, the best way to clean a dirty microwave is quick and simple, and all you need are a few household items. Below, we’ll walk through the steps to clean your microwave inside and out.
What You’ll Need to Clean a Microwave
You probably already have everything you need to clean your microwave. Common kitchen ingredients like baking soda and vinegar make great DIY cleaning solutions and are safe for your microwave.
Here’s what you’ll need to clean it:
- Baking soda
- White or apple cider vinegar
- Lemon juice
- Dish soap
- Water
- Clean sponge or microfiber cloth
- Paper towels
- Toothbrush (for scrubbing hard-to-reach spots)
Vinegar and baking soda are two of the most effective cleaners and make great bases for DIY solutions. They’re also useful for other household cleaning tasks, so it’s worth keeping them on hand.
Try to avoid using harsh chemicals like bleach. It can weaken the plastic interior and damage your microwave over time. It can also leave behind toxic fumes that could potentially pollute your food when you later use your microwave. Instead, stick to the gentler options listed above for a safe and effective cleanse.
Step-By-Step Guide to Cleaning Your Microwave
Now that you have all your supplies, it’s time to tackle the mess. Follow these steps for a quick and easy cleanse.
Step 1: Unplug and Prep Your Microwave
If possible, unplug your microwave from the power source to prevent any electrical mishaps. Remove the turntable and any other detachable parts. If your microwave includes a separate glass plate, safely set it aside to avoid breaking it.
Step 2: Mix Your Cleaning Solution
There are a few simple cleaning solutions you can use to clean your microwave:
- Vinegar solution: Mix equal parts water and white vinegar in a microwave-safe bowl.
- Baking soda solution: Stir two tablespoons of baking soda into one cup of water in a microwave-safe bowl.
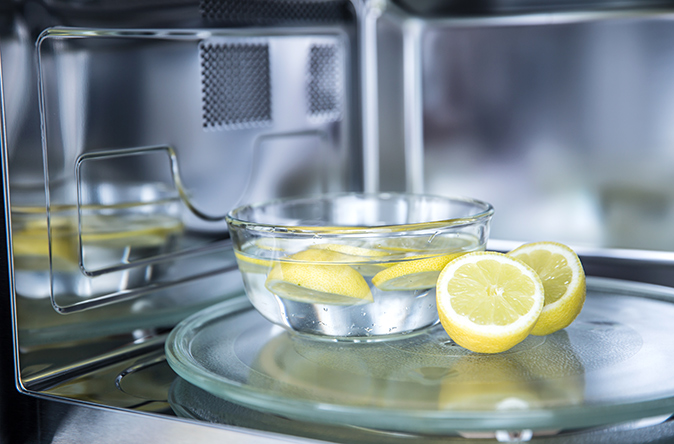
- Lemon and water: Squeeze the juice from one lemon into one cup of water in a microwave-safe bowl, then drop in the lemon halves for extra cleaning power.
Each of these solutions can help get rid of stuck-on food, remove stains, and eliminate odors from your microwave oven.
Keep in mind that you should never mix vinegar with bleach or hydrogen peroxide. This can create dangerous fumes that are harmful to you and your home.
Step 3: Wipe Down the Exterior
Before cleaning the inside of your microwave, make the exterior sparkle. The outside can accumulate dirt, grease, and fingerprints over time, which can cause buttons and finishes to deteriorate.
Use an all-purpose cleaner or a DIY solution of one part dish soap and four parts water in a spray bottle. Wipe down the exterior with a damp cloth or a paper towel. Be sure to clean the control panel, microwave door handle, and any other areas where food may have splattered.
If you have a built-in microwave that sits above your oven’s range, take care to wipe down the underside portion to remove residue from food, steam, and smoke.
Step 4: Steam and Clean the Interior
Now for the main event. Place the bowl containing your preferred cleaning solution in the microwave and heat it for three to five minutes, depending on your microwave’s power. This creates steam that loosens food splatters and makes scrubbing easier.
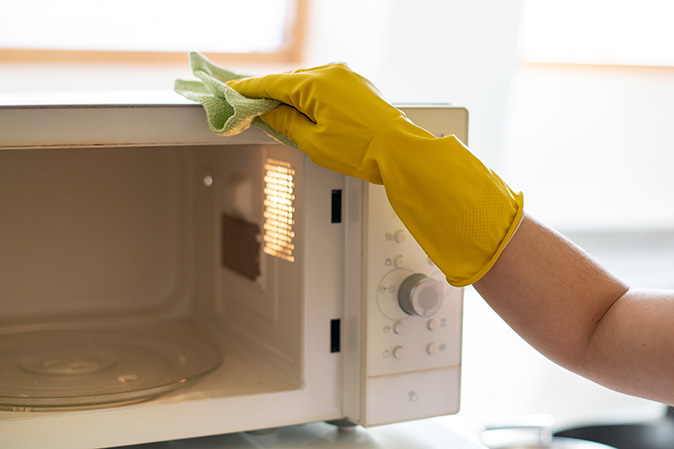
Then, carefully remove the bowl from the microwave using oven-safe gloves or a thick hand towel – it will be hot! Use a damp cloth or sponge to wipe down the inside.
For stubborn stains, dip a cloth or sponge into the cleaning solution and use it to scrub the affected areas. You can also use a toothbrush to get into tight corners and crevices.
Step 5: Wash the Turntable and Accessories
Now that you’ve cleaned the interior of your microwave, it’s time to clean the removable parts. Wash the microwave turntable, glass plate, and other accessories in warm, soapy water. Rinse well and dry with a clean towel before placing them back in the microwave.
Step 6: Final Touches
Give the exterior one last wipe with a damp cloth to remove any smudges or grease. Once everything is dry, plug the microwave back in.
That’s it! Your microwave is now fresh, clean, and ready for your next meal.
How Often Should You Clean Your Microwave Oven?
How often you should clean your microwave depends on how frequently you use it. For good measure, clean your microwave once a week to keep it fresh and odor-free. If food splatters, wipe it up right away to prevent bacteria growth and keep the interior looking spotless.
If you notice any lingering smells or stubborn stains, a deep clean with vinegar, lemon juice, or baking soda can help.
Tips for Keeping Your Microwave Clean
You’ve put in the effort to get your microwave spotless. Now you can keep it clean with these simple habits:
- Cover any food you’re heating with a microwave-safe lid, wax paper, or paper towel to prevent splatters. Avoid colored or recycled paper towels or ones with prints on them, and don’t fold paper towels on top of each other as they can catch fire.
- Wipe up any spills or splatters immediately with a damp cloth or sponge.
- Deodorize regularly by microwaving a bowl of water with lemon. Heat on high for a few minutes, and let the lemon water sit to allow the citrus-infused steam to freshen up your microwave.
- Give your microwave a quick wipe-down once a week to keep it looking and smelling fresh.
- To avoid messes and potential damage, only use microwave-safe bowls, plates, and cups. Don’t put metal utensils, aluminum foil, and other unsafe items in the microwave.
Protect Your Appliances With a Home Warranty
A clean microwave is great, but making sure it stays in working order is just as important. That’s where a home warranty comes in. It can help protect your budget from or replacement costs when your microwave — and other major home appliances — stop working properly.
First American Home Warranty offers for many of your home’s appliances and systems — providing budget protection and peace of mind. Get a free home warranty quote today and see how easy it can be to safeguard your investments in the appliances and systems you rely on.
The contents of this article are provided for general guidance only. First American Home Warranty does not assume any responsibility for losses or damages as a result of using this information.
Please be aware that if you disassemble a covered system or appliance, it can invalidate your home warranty or manufacturer's warranty.





Home Care Buzz Experts
The First American Home Care Buzz team is made up of experienced home warranty writers and editors. Our team provides valuable insights and information to help homeowners like you meet the daily challenges of homeownership.
This article is about...