
How to Patch and Fill Drywall: A Step-By-Step Guide
FEBRUARY 26, 2024 | Home Care Buzz Experts | 6 minute read
Drywall is one of the most common and efficient materials used in modern home construction. It's likely what most of your walls and ceilings are made of, and even though it's durable, it's not indestructible. With enough force, many common household items can put a dent or hole in your drywall. This compromises your home's insulation, creates an entrance for pests, and exposes wall frames to moisture and mold. (Not to mention, it doesn’t exactly look great.) If the damaged area is small, patching drywall is a basic home improvement project that can take a few hours to complete.
In this DIY drywall repair guide, we'll review the tools and materials you'll need, the steps required for fixing a drywall surface, and when replacing drywall is a better option. However, before we discuss how to repair drywall, let's start with some safety tips.
Prioritize Protection
Drywall, sometimes referred to by the brand name Sheetrock, is made using gypsum, resin, paper, silica, and other natural materials. While these things aren't necessarily harmful, drywall dust can cause respiratory issues — ranging from mild to severe — when inhaled during drywall repair and installation. It would help if you used the following personal protective equipment (PPE) whenever fixing a drywall surface:
- Respiratory mask rated FFP1 or higher
- Safety goggles or glasses
- Work gloves
Now that you've collected your PPE let's pick out your tools and materials and learn how to repair drywall!
How to Fix Dents in Drywall
When patching drywall, there's a big difference between repairing a hole and fixing a dent, right down to the necessary tools. If you're fixing a dent, you'll only need the following tools and materials:
- Lightweight spackle or joint compound
- Putty knife
- Sandpaper
- Paint that matches the damaged wall or ceiling
- Paintbrush and roller
Dents are the most common damage on drywall; luckily, they’re also the simplest to fix.
Step 1: Apply spackle to the dent, ensuring it fills the entire dent but remains even with the rest of the wall. (The more it sticks out, the more sanding you’ll have to do later!)
Step 2: Wait for the spackle to dry. The instructions on your spackle should tell you how long it takes.
Step 3: Use sandpaper to smooth the dried spackle and level it with the wall’s surface.
Step 4: Wipe off dust or residue and paint the spackled area.

How to Patch Small Holes in Drywall
When you learn how to patch small holes in drywall, you'll need the tools and materials you used above for dents and a self-adhesive drywall patch. You can buy a drywall patch kit from the hardware store and speed up learning how to cover holes in drywall. For small holes, it shouldn't take much time to make your wall or ceiling look new.
Step 1: Apply a drywall patch to the hole, following the manufacturer's instructions.
Step 2: Apply spackle or joint compound to the patch with a putty knife, covering the entire patch and adjacent wall section to ensure a blended appearance.
Pro tip: Tapering the spackle with the knife where the patch meets the wall can help make your repairs less noticeable.
Step 3: Let the spackle dry.
Step 4: Use sandpaper to smooth the spackle and blend it into the surrounding wall.
Step 5: Brush off any dust and debris, and paint the spackled patch.

How to Fix a Larger Hole in Drywall
Larger holes can be more challenging, but you can handle the repair with patience and the right tools. If you don't have the time or tools to undertake this task don't be afraid to call a drywall specialist.
To patch larger drywall holes, you’ll need the same materials used for dents, plus:
- Drywall saw
- Tape measure or carpenter's square
- Stud finder
- Pencil
- Utility knife
- Drywall knife
- Drywall screws
- Power drill
- Fiberglass drywall tape
- Wood strips (or furring strips)
- Fresh sheet of drywall (for the wall patch)
Step 1: With a carpenter's square or tape measure, measure and trace out a square-shaped piece of drywall that includes one inch of drywall past each edge of the hole.
Step 2: Use a drywall saw to cut out the square surrounding the damaged portion(s). Be careful not to cut too deep if the hole is over a stud — you don’t want to damage the stud!
Step 3: Take your replacement sheet of drywall, then measure a piece the same size as the one you removed and cut it to size with a utility knife. You can also take the piece you just removed, place it on the replacement sheet, and trace around it as a stencil.
Step 4: You must secure backing strips behind the patch area. To do this:
- Cut a few pieces of wood or furring strips to a length a few inches longer than the hole size.
- Place the wood strips into the hole vertically, making them parallel to the studs.
- Secure them to the back of the drywall with drywall screws – these strips help to secure the patch in place.
If the drywall hole is over a stud, you may only have to use a couple of strips, if any at all.
Step 5: Add in and secure the replacement drywall square to the backing strips or stud with a drill and drywall screws. Place the screws roughly an inch from the edge of the new piece to avoid splitting the drywall and near the center of the stud or the backing strip to keep the drywall screws from slipping. Make sure any screw heads lie slightly below the surface of the drywall to make finishing the patch easier.
Step 6: Place fiberglass drywall tape over the gaps where the replacement drywall meets the rest of the wall.
Step 7: Apply spackle or joint compound to the replacement drywall, tape, and screw heads. Let it dry completely, which may take a few hours.
Step 8: Sand the patched area with sandpaper until smooth and even.
Step 9: Spread a second layer of spackle or joint compound to the patched area and let it dry completely.
Step 10: Sand the area again.
Step 11: Paint the patched area and let it dry. Then, pat yourself on the back because you've successfully learned how to fix a hole in drywall!
Note: If the above tasks seem outside your skillset, do not be afraid to call a drywall specialist to undertake the repair.
Drywall Repair vs. Replacement
You can repair most drywall damage, but there are a couple of situations where replacing drywall is a better choice.
- Flooding: If you've had a burst or cracked pipe in your home, chances are paint and spackle won't be enough to fix warping and discoloration. And, unless you could dry all your walls and ceilings immediately, there's an increased chance for mold growth (something nobody wants to deal with).
Note: If you see any discoloration on ceiling drywall, our process for removing water stains on ceilings may be enough to fix the issue.
2. Cracked Drywall: While cracks don't indicate any serious damage to drywall, they show uneven pressure on the panels. Unless drywall panels are replaced or resituated, cracks will continue to grow long-term and need to be replaced at some point.
How to Prevent Drywall Damage
Now that you know how to fill holes in drywall, you may want to learn how to protect those areas so you don’t have to repeat all that hard work. Here are some tips for protecting your drywall from future damage:
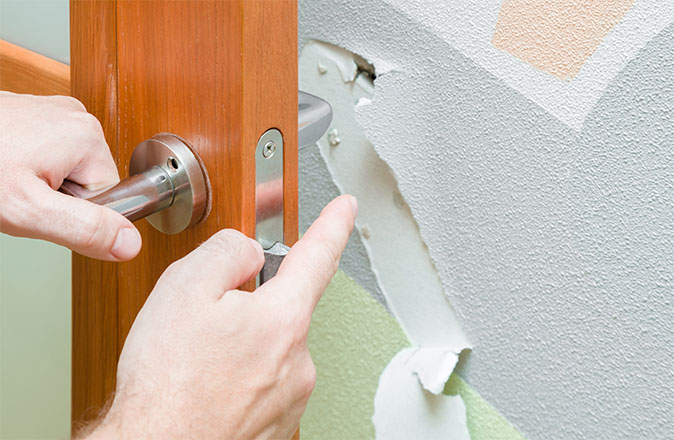
- Inspect your home's door stops for damage and ensure they're secure and working properly. This can help prevent door handles from puncturing drywall if doors open too quickly. If you don't have door stops on all your doors, it's a good idea to install them.
- Don't place furniture against or too close to walls. Even accidentally bumping into furniture can be enough to dent or puncture drywall.
- When possible, hang artwork and pictures with adhesive strips and fasteners that use these strips. Hanging frames with nails has the potential to crack the drywall.
Patch Your Home Budget with a Home Warranty
Home warranty plans don’t cover replacing or patching drywall. They can, however, save you time and money on appliance and system repairs and replacements, leaving you with more time to focus on home projects (like DIY drywall repair). Get a free quote to learn more about coverage for your home appliances and systems.
The contents of this article are provided for general guidance only. First American Home Warranty does not assume any responsibility for losses or damages as a result of using this information.


Keep Reading






Home Care Buzz Experts
The First American Home Care Buzz team is made up of experienced home warranty writers and editors. Our team provides valuable insights and information to help homeowners like you meet the daily challenges of homeownership.
This article is about...