How to Clean an Oven: A Step-by-Step Guide
APRIL 17, 2025 | Home Care Buzz Experts | 6 minute read
Learning how to clean your oven might not be the most exciting task, but it’s an important one. A dirty oven can affect how your food tastes, cause smoke while cooking, and even be a fire hazard. But with the right tools and techniques, you can have your oven looking and smelling like new in no time.
This guide will show you the best way to clean an oven, step by step.
How Often Should You Clean Your Oven?
How often you should clean your oven depends on how much you use it. If you cook often, aim to deep clean it every few months. If you only use it occasionally, twice a year may be enough. But don’t wait until you see thick grease or smell burning food — spot cleaning spills as they happen can make deep cleaning much easier.
Pro tip: If your oven smells when preheating, smokes while cooking, or has baked-on spills, it’s time for a cleaning.
13 Steps to Cleaning Your Oven
Keeping your oven clean is easier than you might think. By following these simple steps, you can remove grease, grime, and food buildup, leaving your oven fresh and ready for your next meal.
Step 1: Gather Your Supplies
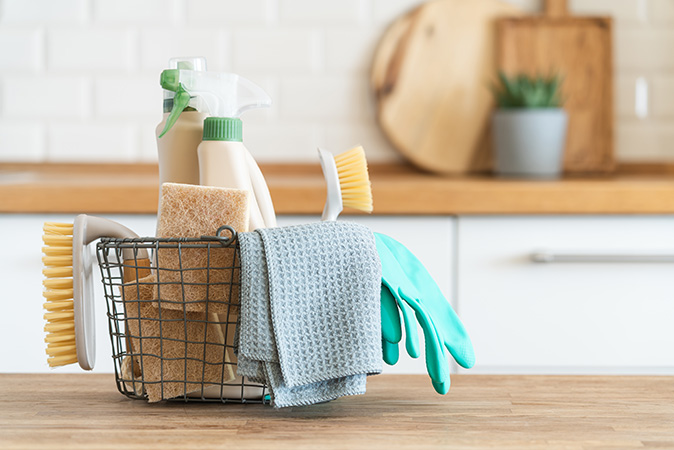
Before you start, gather all of your cleaning supplies. Here’s what you’ll need:
- Rubber gloves
- Safety glasses
- Oven cleaner (you can use either store-bought or DIY household cleaners)
- Sponges, microfiber cloths, and paper towels
- A large garbage bag
- A silicone scraper or spatula
- A toothbrush
- A bucket or large bowl
- Warm water and mild dish soap
- White vinegar
- Baking soda
Step 2: Prepare Your Oven
For safety, start by unplugging your electric oven or turning off the gas supply to your gas oven before you begin cleaning. Open the oven door and carefully remove the oven racks. If the racks are especially dirty, place them in a large plastic bag or soak them in your sink or bathtub with warm, soapy water.
Step 3: Remove Loose Debris
Before applying any cleaning solution, take a dry cloth or paper towel and wipe away any loose debris or crumbs from the oven's interior. If there are larger, stuck-on pieces, use a silicone scraper or non-metal spatula to gently loosen them, taking care not to scratch the oven surface.
Step 4: Apply Oven Cleaner to the Interior
Put on your rubber gloves and safety glasses before handling any oven cleaner, especially if you’re using a chemical-based one. Spray or spread the cleaner evenly inside the oven, focusing on baked-on or greasy areas. If you’re using a store-bought cleaner, follow the instructions on the label and avoid spraying the heating elements or gas burners.
For a natural alternative, make a paste by mixing ½ cup of baking soda with a few tablespoons of water. Spread the paste over the oven's interior, avoiding the heating elements. Let the cleaner sit — most chemical cleaners need about 20 to 30 minutes, while the baking soda method works best if you let it sit overnight.
Step 5: Clean the Oven Door and Control Panel
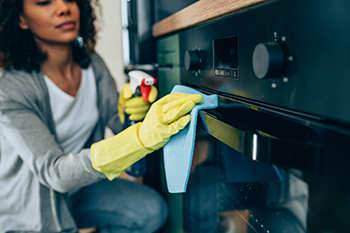
While the oven cleaner is working inside, move onto the exterior. Use a soft cloth or sponge dampened with warm, soapy water to gently clean the oven door and control panel. If you’re cleaning a stainless-steel appliance, you’ll need to use a soft or microfiber cloth that won’t scratch the finish.
And if your oven has a glass door, you may need to use a little white vinegar to remove any streaks or buildup. Be gentle with the control panel — excess scrubbing can wear away labels or damage buttons.
Step 6: Soak the Oven Racks
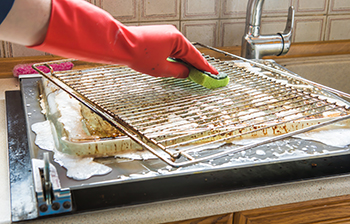
If you haven’t already, soak your oven racks in a sink or tub filled with hot, soapy water. Let them sit for at least an hour — overnight is even better for heavy buildup. If they’re particularly greasy, spray them with oven cleaner before soaking.
For an easy, mess-free method, place the racks in a large plastic bag, spray them with oven cleaner, seal the bag, and let them sit for an hour. This helps break down grime without scrubbing and cuts down on harsh chemical smells in the air.
Step 7: Scrape Off Loose Debris
After the oven cleaner has had time to work, put your rubber gloves back on and use your silicone scraper or spatula to gently remove any loose debris from the oven's interior. Work gently to avoid scratching the oven’s surface.
Stubborn spots may need a second application of cleaning solution or baking soda paste.
Step 8: Wipe Down the Oven Interior
Dampen a soft cloth or sponge with warm, soapy water and wipe away the cleaner and loosened grime. If you used the baking soda method, spray a little vinegar over any remaining paste — it will fizz and help lift stubborn residue. Wipe everything down until the inside is clean. You may need to rinse and wring out your cloth several times during this step.
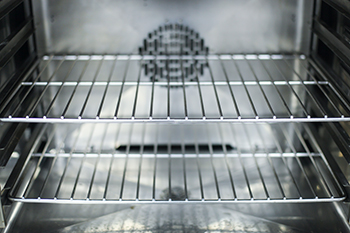
Quick tip: If your oven door makes it hard to reach inside, check your owner’s manual — many ovens allow you to remove the door for easier cleaning.
Step 9: Scrub the Oven Vents and Corners
Use an old toothbrush or a small scrub brush to clean the oven’s vents and corners. These areas tend to collect grease and grime, so a little extra scrubbing can go a long way. This step also helps prevent smoke or unwanted odors when you use your oven again.
Step 10: Rinse and Dry the Oven's Interior
After wiping everything down, use a clean, damp cloth to go over the interior again to remove any remaining soap residue or oven cleaner. Make sure no cleaner is left behind, especially if you use a chemical-based product. Follow up
with a microfiber cloth or paper towels to dry the oven's interior completely.
Step 11: Clean the Oven Racks
Take the oven racks out of the sink or plastic bag and scrub them with a sponge, cloth, or scrub brush to remove any remaining grime or oven cleaner. Rinse them thoroughly under warm running water. If they still have some stuck-on grease, sprinkle baking soda on a damp sponge and scrub again. Rinse and allow them to dry completely before placing them back in the oven.
Step 12: Put Everything Back and Turn the Power On
Once the oven racks are dry, carefully slide them back into their slots in the oven. Plug in your oven or turn the gas valve back on, and you're ready to start cooking in your freshly cleaned oven.
Step 13: Keep Your Oven Clean
To avoid heavy buildup in the future, wipe up spills as soon as they happen. Try to give your oven a light cleaning every few weeks by wiping down the interior with warm, soapy water or a vinegar solution. Regular oven maintenance makes deep cleaning much easier and keeps your oven working efficiently.
Additional Oven Cleaning Tips
Keep your oven in top shape with these quick and easy oven-cleaning tips:
- Use an oven liner: Place a non-stick oven liner on the bottom of your oven to catch drips and spills.
- Clean spills right away: Wipe up fresh spills as soon as the oven cools. This helps prevent food and grease from hardening and becoming harder to remove later.
- Leave a bowl of water in the oven after baking: After turning off your oven, place an oven-safe bowl filled with water inside and let the steam loosen any stuck-on grease. Once cooled, wipe away the softened residue with a cloth.
- Take advantage of the self-cleaning setting: If your oven has a self-cleaning feature, use it periodically to burn off grease and grime — just be sure to ventilate your kitchen, as it can produce strong fumes.
- Ventilate while using strong cleaners: If you’re using a commercial oven cleaner, open your windows or turn on a fan to help clear out fumes and improve air circulation.
- Don’t forget the knobs and handles: Grease and grime can build up on your oven’s knobs and handle over time. Wipe them down regularly with warm, soapy water to keep them clean.
Stay Ahead of Oven Repairs and Replacements
Regular maintenance and prompt cleanup of spills keep your oven in great condition and can help prolong its life. But if your oven (or range or cooktop) does experience a breakdown — as most appliances eventually do — when you have a First American home warranty, it can help. Learn more and get a free home warranty quote today.
The contents of this article are provided for general guidance only. First American Home Warranty does not assume any responsibility for losses or damages as a result of using this information.
Please be aware that if you disassemble a covered system or item, it can invalidate your home warranty or manufacturer's warranty.




Keep Reading