
Project Overview

Intermediate

1 Hour and 30 Minutes

< $150
All Values are Estimates
Whether it's leaking into the bowl or onto the floor, a leaky toilet can be a big concern for homeowners. Steadily leaking water can damage your floors and walls and increase your water bill if left unaddressed. And if you only have one bathroom in your home, a malfunctioning toilet can leave you scrambling to find alternative places to use the restroom.
When you find your toilet tank leaking, your first thought may be to start looking for plumbers. However, you can fix most tank leaks in an afternoon’s time, without much plumbing or DIY knowledge.
In this guide, you'll learn how to identify leaks coming from the tank, the most common causes, how to fix a leaking toilet tank, how to prevent future leaks, and more.
How to Identify a Leaking Toilet Tank
Water is essential to all toilet functions, and a leaky toilet doesn't necessarily mean an issue with the tank. Leaks can also come from the flange, the water supply valve, or a crack in the porcelain.
Related: If you find that your leak is caused by flushing something you shouldn’t have, check out our tips for unclogging your toilet.
So, how do you know if your toilet tank is leaking, or the issue is elsewhere in the toilet? If you flush the toilet and find water on the back of the toilet rim, where the tank meets the bowl, there's a good chance you have a leaky toilet tank. If you're concerned that water in the tank is slowly leaking into the bowl, it can be a little harder to determine. Here are two methods to try:
First, add about a dozen drops of food coloring to the water in the tank and wait about half an hour. If the water in your toilet bowl turns the same color, you have a leaking toilet tank on your hands.
If you don't have food coloring, you can also turn off the water supply valve located on the wall next to the base of the toilet and wait overnight. If there's hardly any water left in the tank in the morning, your tank is leaking into the bowl.
Common Causes of a Leaky Toilet Tank
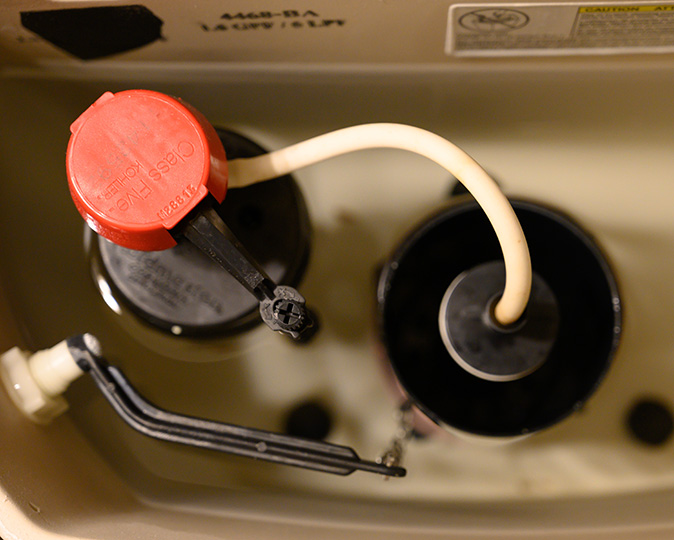
Both types of tank leaks occur near the bottom of the tank but are caused by two different components: the flapper (or flush valve) or the spud washer (or tank-to-bowl washer). The flapper keeps water in the tank until you pull the lever to flush, which pulls the flapper up and allows water into the bowl. When this corrodes, the seal between the tank and bowl becomes compromised, and water leaks into the bowl. The spud washer sits just below the flapper and discharge tube that funnels water from the tank to the bowl and creates a watertight seal between these two components.
The flapper keeps water from leaking from the tank to the bowl, and the spud washer keeps water from leaking through the slight gap between the tank and the bowl. So, if you have a leaky toilet with water moving from the tank into the bowl, you must replace the flapper. If water leaks through the small gap between the tank and the bowl, you must replace the spud washer.
How to Fix a Toilet Tank Leaking from the Flapper
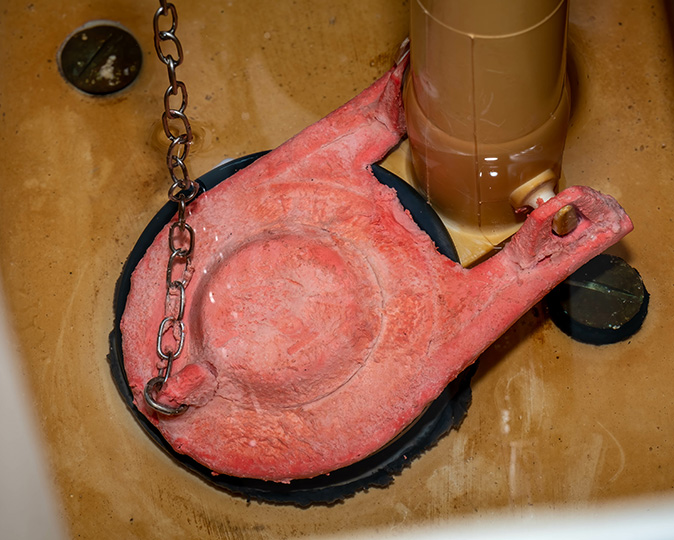
Let’s first address how to fix the simpler of the two leaky toilet tank causes — the flapper. Replacement flappers, including the flapper chain, can be easily found at your local hardware stores. Once you have your replacement, you're ready to get to work!
Note: Most toilet flappers are two inches, but it’s wise to measure first as they come in various sizes.
Step 1: Shut Off the Water
Find the water shutoff valve on the wall next to your toilet, just above the baseboard. Turn the knob clockwise to shut off the water to the toilet tank.
Step 2: Empty Excess Water from the Tank
Remove the toilet tank lid. Flush your toilet to empty the water in the tank. The valve seat covered by the flapper typically sits just above the bottom of the tank, so you'll need to use a sponge or towel to absorb the small amount of water resting at the bottom.
Step 3: Remove the Old Flapper
Unhook the flapper chain from the handle lever and let it rest in the tank. Slide the ears at the rear of the flapper off the pegs of the overflow tube (or snap them off if they're plastic instead of rubber). Remove the old flapper and chain from the tank.
Step 4: Install the New Flapper
Center the new flapper over the valve seat and slide the ears over the pegs sticking out from the base of the overflow tube. Hook the flapper chain to the end of the handle lever, ensuring there's just a bit of slack in the chain.
Step 5: Turn the Water Back On
Turn the water shutoff valve to the open position until water returns to the tank. Make sure you no longer see the toilet tank leaking into the bowl before replacing the lid.
How to Fix a Toilet Tank Leaking from the Spud Washer
Replacing the spud washer takes more time and a few more tools. In addition to a new spud washer and a sponge or towel, you'll need new tank bolt gaskets, an adjustable wrench, a flat-head screwdriver, a bathroom surface cleaner, and a rag. Tank bolts, gaskets, and spud washers can be found together in tank-to-bowl kits at your local hardware store.
Step 1: Shut Off the Water
Find the water shutoff valve on the wall next to your toilet, just above the baseboard. Turn the knob clockwise to shut off the water to the toilet tank.
Step 2: Empty Excess Water in the Tank
Remove the toilet tank lid. Flush your toilet to empty the majority of water in the tank. The valve seat covered by the flapper typically sits just above the bottom of the tank, so you'll need to use a sponge or towel to absorb the small amount of water resting at the bottom.
Step 3: Remove the Tank Bolts
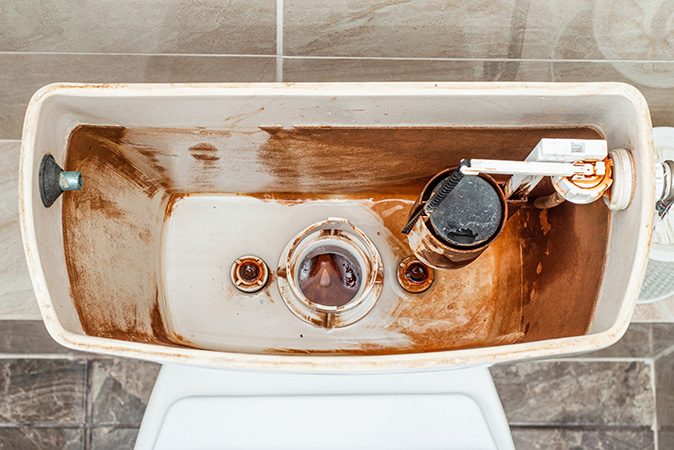
You should see two large bolt heads inside the tank on either side of the flapper. These bolts run through the bottom of the tank and the back rim of the toilet to connect the two, then extend through the rear underside of the bowl. Find the ends of these bolts at the rear bottom of the bowl — specifically, the nuts that secure them to the bowl. Hold the nut with your adjustable wrench while you unscrew the bolt head in the tank until the bolts come free.
Step 4: Separate the Tank and Bowl
The toilet tank and bowl should now be disconnected, and you can lay the tank on the ground. The toilet tank is heavy, so you may need help lifting it off the bowl and onto the ground. Having old towels on the bathroom floor may be a good idea to set the tank on safely.
Step 5: Replace the Spud Washer
The large rubber washer is located on the bottom of the toilet tank. Unscrew it by hand or with the adjustable wrench and throw it away. Screw the new spud washer onto the spud nut until it is tight and flush with the bottom of the tank.
Step 6: Replace the Tank Bolts and Gaskets
If your spud washer needs replacing, chances are good that the tank bolts have become rusty, and the gaskets are worn. To avoid having to disassemble your toilet again later, it's a good idea to replace these as you reconnect the tank and bowl. Clean the bolt holes in the tank and the bowl with a rag and your cleaner to ensure no debris prevents a flush fit, and then slide the gaskets onto the bolts.
Step 7: Reconnect the Tank and Bowl
Lift the tank and place it back onto the bowl, ensuring that the spud washer has a firm seal over the corresponding hole on the bowl and that the tank-to-bowl bolt holes align. Screw in the new tank-to-bowl bolts and gaskets and reconnect their nuts on the undersides.
Pro tip: Alternate screwing the tank bolts on either side until they're secure to ensure even placement, and don't overtighten the bolts, or you may crack the porcelain around the holes.
Step 8: Turn the Water Back On
If a gap formed during reassembly, place some rags under the back of the toilet. Turn on the water shutoff valve until water returns to the tank. Ensure that you no longer see the toilet tank leaking into the bowl before replacing the lid.
When to Call a Professional
If you notice any cracks in the porcelain of your tank or bowl while making your repairs and still have a leaky toilet, it’s time to call a professional — or get a new toilet. And if you have a home warranty with First American, you’ve already got plumbing warranty coverage that includes repair and replacement of your toilet tank, toilet bowl, and mechanisms. The DIY life doesn't fit everyone's schedule, and a home warranty plan helps save you the time and costs of performing these repairs yourself. To discover more ways home warranty can save you time and money around the house, get your free personalized quote for homeowners today.
The contents of this article are provided for general guidance only. First American Home Warranty does not assume any responsibility for losses or damages as a result of using this information.
Please be aware that if you disassemble a covered system or item, it can invalidate your home warranty or manufacturer's warranty.


Keep Reading






Home Care Buzz Experts
The First American Home Care Buzz team is made up of experienced home warranty writers and editors. Our team provides valuable insights and information to help homeowners like you meet the daily challenges of homeownership.
This article is about...