
How to Install a Window AC Unit: A Step-by-Step Guide
MAY 02, 2025 | Home Care Buzz Experts | 4 minute read
Installing a window air conditioner can be an affordable way to cool a room. But if you’ve never installed one before, you might wonder where to start. This guide will walk you through the process step by step, so your window AC installation is simple and stress-free.
Installing a Window AC Unit in 6 Steps
Installing a window AC unit is a straightforward process if you follow the right steps. Below, we provide easy-to-follow instructions so you can get your unit up and running quickly.
1. Gather Your Tools and Materials
Before you start, gather everything you need. Having the right tools on hand will make installation smoother. Here’s what you’ll need:
- Window AC unit
- Measuring tape
- Screwdriver (Phillips and flathead)
- Level
- Foam insulation strips (usually included with the unit)
- Brackets (if required by your AC’s model)
- Weatherproof sealant (for extra insulation)

Pick a window close to an outlet that can support the unit’s weight. Most window AC units work only in double-hung styles with bottom sashes that can be raised and lowered.
Once you’ve designated a window for the AC unit, follow these steps:
- Open the window and clean the sill to remove dust and debris.
- Measure the window opening to make sure the AC unit will fit.
- If your unit has accordion side panels, attach them.
- Check the filter and make sure it’s in place.
3. Install the AC Unit in the Window
Now it’s time to lift the unit into place. Window ACs are heavy, so ask for help if needed.
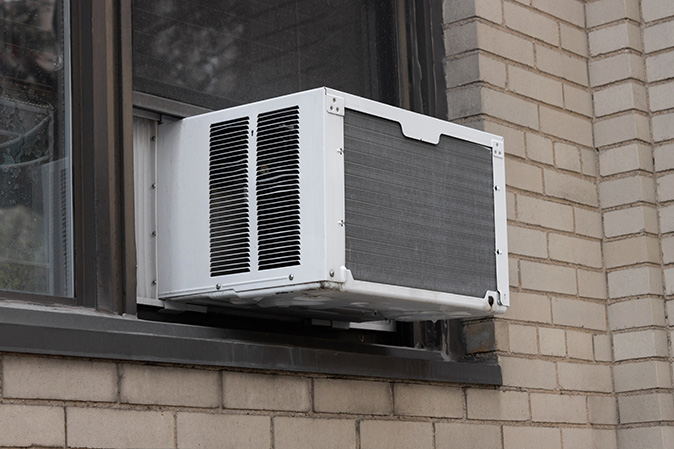
- Lift the AC unit and place it on the windowsill, tilting the back end slightly downward for drainage.
- Lower the window sash slowly until it rests against the top of the unit.
- Center the AC so it sits evenly in the opening.
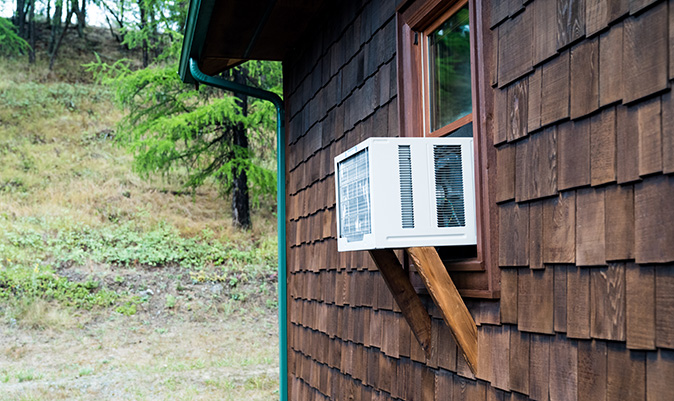
If your model includes mounting brackets, you’ll want to:
- Position the brackets on the windowsill according to the manufacturer’s instructions.
- Use a pencil to mark where the screws will go.
- Drill pilot holes if needed, then secure the brackets with screws.
- Once installed, rest the AC unit on the brackets for some added support.
4. Secure the AC Unit
Once the unit is centered, secure it to the window frame:
- Use screws to fasten the unit in place, following the manufacturer’s instructions.
- Make sure the unit sits firmly against the window sash and doesn't shift.
5. Seal and Insulate the Sides
Once the AC is secured, fill in the gaps around it:
- Extend the side panels until they touch the window frame, then screw or clip them into place.
- Use foam insulation strips to seal any openings and prevent air leaks.
- If needed, apply weatherproof sealant around the edges for extra insulation.
6. Plug in and Test Your AC Unit
Now that your AC is installed, it’s time to power it up:
- Plug the unit into a dedicated outlet (avoid extension cords, as they can overheat).
- Turn it on and check for any vibrations or unusual noises.
- Adjust the settings to your desired temperature.
How to Choose the Right AC Unit
Before buying a window AC, consider these factors:
- Room size: Measure the space and check the unit’s BTU rating to make sure it’s powerful enough.
- Window type: Some units work best with double-hung windows, while others fit sliding or casement windows.
- Power source: Make sure your outlet can handle the AC’s power requirements.
- Energy efficiency: Look for an ENERGY STAR®-rated model to save on electricity costs.
Alternative Options for Cooling Your Home
Not every home or window is suited for a window AC unit. If you need an alternative way to stay cool, here are a few options to consider:
- Portable AC: A mobile cooling unit that can be placed in different rooms and vents through a window or sliding door. It’s simple to set up but may not cool as efficiently as a window AC.
- Wall AC unit: Similar to a window unit but installed directly into an exterior wall. It requires you to cut a hole in the wall, but it frees up window space and provides a permanent cooling solution.
- Central air conditioning: The most effective way to cool an entire home. It requires ductwork and professional installation but offers consistent temperature control throughout the house.
- Ductless mini-split system: A high-efficiency cooling system designed for targeted cooling in specific rooms. It needs professional installation but provides long-term energy savings and improved comfort.
- Evaporative cooler: Also known as a swamp cooler, this unit adds humidity to the air and functions best in dry regions. It's an energy-efficient alternative, but less effective in humid areas.
Protect Your AC System with a Warranty
Installing a window AC unit doesn’t have to be complicated. With the right tools and steps, you can do it yourself in no time.
If you’d like some extra peace of mind that your cooling systems are protected from wear and tear, a home warranty may be your best bet. Coverage for your air conditioner — and your HVAC system in general — can take care of repairs and replacements, so you have less to worry about during the hot summer months.
If you’re ready to cover your systems and appliances, get a free home warranty quote today.
FAQs About Window AC Unit
Can you put a window AC in any window?
Window AC units are designed to work with double- or single-hung windows. You may be able to install them in windows with casements or sliding windows, but additional tools and hardware may be required.
Does a window AC unit need to be on its own outlet?
Typically, yes. Larger window ACs require a dedicated outlet due to the amount of power they draw. However, most smaller units can use a standard household outlet.
How much does it cost to install a window AC unit?
If you're installing your window AC yourself, all you'll pay will be the cost of the unit (typically anywhere from $150 to $800) and any hardware required. If you choose to have a professional install your window, you can likely budget for $100 to $300 in labor costs.
The contents of this article are provided for general guidance only. First American Home Warranty does not assume any responsibility for losses or damages as a result of using this information.
Please be aware that if you disassemble a covered system or item, it can invalidate your home warranty or manufacturer's warranty.

Keep Reading





Home Care Buzz Experts
The First American Home Care Buzz team is made up of experienced home warranty writers and editors. Our team provides valuable insights and information to help homeowners like you meet the daily challenges of homeownership.
This article is about...