
How to Measure for Replacement Windows: A Guide
JUNE 16, 2025 | Home Care Buzz Experts | 4 minute read
Project Overview

Beginner

1 Hour

< $150
All Values are Estimates
Are you ready to replace your windows? The first and most crucial step is getting the measurements right. If your new windows don’t fit your existing frames, you could run into leaks, drafts, or major installation problems.
Let’s walk through the process of how to measure for replacement windows the right way. We’ll explain the standard parts of a window, show you where and how to measure them, and break down the replacement process step by step.
What Are the Different Parts of a Window Frame?
Before you start measuring, it helps to know the basic parts of your window frame. You’ll be measuring from and between these parts, so understanding what’s what is key.
- Head: The top horizontal part of the window frame.
- Jambs: The vertical sides of the frame.
- Sill: The bottom horizontal part of the window frame.
- Apron: This is the decorative trim located just below the sill. You won’t measure it, but it’s good to recognize.
- Weep holes: Small drainage holes at the bottom of the frame that let moisture out. These don’t affect your measurements, but if they’re blocked or damaged, it might be time for a window replacement.
Understand the Key Window Measurements
You’ll take three main measurements for each window: width, height, and depth. You’ll also check if your window frame is plumb and level.
Let’s break that down:
- Plumb: This means the window is perfectly vertical (straight up and down).
- Level: This means it’s perfectly horizontal (straight across).
Checking for plumb and level tells you whether your window frame is square. That’s important, because if the frame isn’t square, your new window might not sit right — even if the numbers are technically correct.
How to Measure Windows for Replacement
Now that you know the parts of a window frame and the different measurements, it’s time to get to work. Here are the steps in the process of measuring for replacement windows in your house.
Step 1: Get Your Tools Together
These are some of the tools you’ll need to measure your windows:
- A tape measure
- A level
- Something to record your measurements (paper, phone, or tablet)
Double-check that your tape measure is in good condition and easy to read. A slight bend or twist can mess up your numbers.
Step 2: Measure the Window Width
You’ll measure the width inside the window frame from jamb to jamb. Take three horizontal measurements:
- Across the top
- Across the middle
- Across the bottom
Hold the tape measure snug and straight. If you angle it or measure too far in or out, the number won’t be accurate. Write down all three measurements, then circle the smallest number. That’s the one you’ll use when ordering your replacement window.
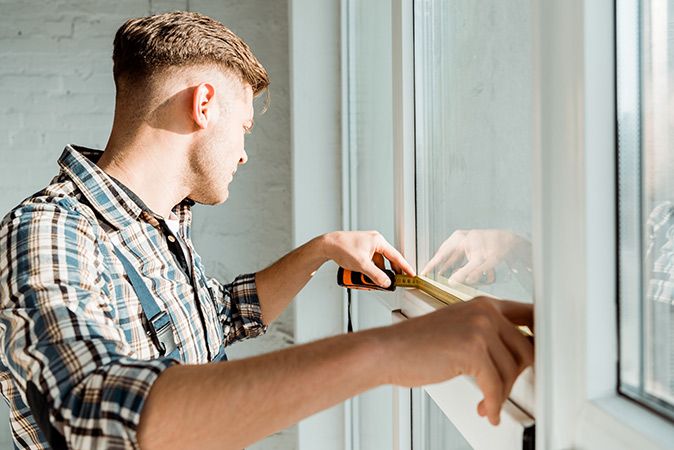
Step 3: Measure the Window Height
Now measure from the head (top) of the frame down to the sill (bottom). Take these three vertical measurements:
- On the left side
- In the center
- On the right side
Again, use the smallest number. If your windowsill is sloped, measure from the highest point, typically where the sill meets the inside of the frame.
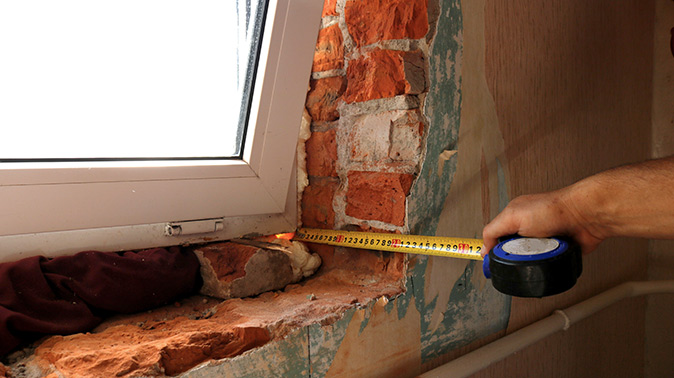
Step 4: Measure the Window Depth
Next, measure how deep the window frame is to help ensure your new window will sit correctly inside the opening. To do so, place your tape from the inside stop (the edge closest to you) to the outside stop (the far edge of the frame). That’s your depth.
Most replacement windows need at least 3¼ inches of depth. If your frame is shallower, you might want to talk to a window installer or other professional about alternative options.
What Kind of Window Are You Replacing?
The type of window you have can change how, or what, you need to measure. Let’s look at the different types of windows and how measuring them can vary.
Sliding, Single-Hung, or Double-Hung Windows
These are the most common residential window types. Use the standard width, height, and depth measurements we covered above.
Awning or Casement Windows
Awning or casement windows are hinged and usually open outward. If possible, open them fully before measuring. You may need to work around crank handles or hinges, depending on the specific design of the window.
Bay or Bow Windows
These windows have multiple angled sections, so you’ll likely need to measure each section individually. Because of the complexity, it’s often best to get a professional measurement for bay or bow windows.
Finishing Touches for Measuring Windows
As you can see, measuring your windows for replacement is a simple process when you break it down one step at a time. Once you’ve got accurate numbers, you can move forward with the fun part: selecting your new replacement windows — without second-guessing your measurements.
Another Way to Keep Your Home Comfortable
Replacing aging or defective windows with new ones can help lower your home energy costs, increase your property’s value, and enhance your living space. Home warranty coverage is another smart step toward making your home more comfortable. While windows aren’t part of a home warranty plan, many major home systems and appliances are, like your water heater, oven/range/cooktop, dishwasher, and much more.
A home warranty can help safeguard your budget from costly repairs or replacements when covered appliances and systems break, providing peace of mind and keeping your home running smoothly.
Ready to explore your home warranty options? Get a free quote today.
The contents of this article are provided for general guidance only. First American Home Warranty does not assume any responsibility for losses or damages as a result of using this information.
Please be aware that if you disassemble a covered system or item, it can invalidate your home warranty or manufacturer's warranty.




Home Care Buzz Experts
The First American Home Care Buzz team is made up of experienced home warranty writers and editors. Our team provides valuable insights and information to help homeowners like you meet the daily challenges of homeownership.
This article is about...