
Cleaning and Maintaining Your Ceiling Fan
OCTOBER 18, 2024 | Home Care Buzz Experts | 6 minute read
Ceiling fans are not only functional but also add aesthetic value to a room. However, like any other appliance, they require periodic attention to keep them in top condition. Whether you’re installing a ceiling fan for the first time or maintaining an existing one, understanding the basics of upkeep can save you from potential issues down the line.
Regular care and maintenance of ceiling fans can help prevent common problems like wobbling, noise, and reduced airflow. It can also help improve energy efficiency, potentially reducing your electric bills. Regular cleaning and inspection can identify minor issues before they become major problems, ensuring your fan remains a reliable and effective cooling solution,
In this blog, we will cover the essential aspects of ceiling fan maintenance, including cleaning techniques and inspecting for common problems.
Cleaning
Regular cleaning is a fundamental part of any ceiling fan maintenance checklist. Dust and dirt can accumulate on the blades and motor, affecting the fan’s performance and longevity. Here’s how to keep your ceiling fan clean and efficient:
Vacuum and Dust
Dust buildup on blades can reduce airflow, spread dust, and cause your fan to wobble. Regular dusting prevents these issues and keeps your fan spinning smoothly.
Tools Needed:
- Microfiber cloth
- Vacuum with brush attachment
- Step ladder
Step-by-Step Guide
- Turn off the fan: Ensure the fan is completely turned off to avoid any accidents.
- Set up your ladder: Position the ladder under the fan, ensuring it is stable.
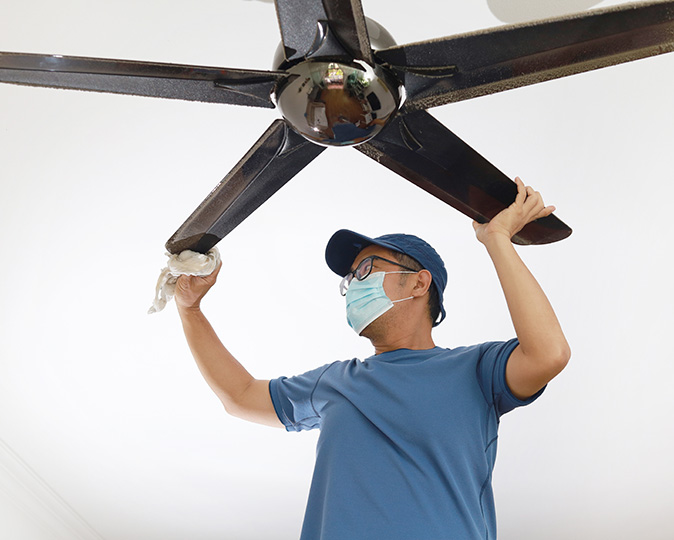
- Dust the blades: Gently dust the fan blades with a microfiber cloth. Start at the center of the blade and move outward.
- Vacuum the blades: Attach the brush attachment to your vacuum and gently vacuum each blade to remove any remaining dust.
- Wipe down the blades: For a thorough cleaning, dampen a cloth slightly and wipe the blades. Be careful not to let liquid drip into the motor.
Fan Motor Cleaning
Dust and dirt can accumulate in the fan motor, reducing efficiency and potential overheating. Cleaning the motor is an important ceiling fan maintenance task that can help maintain fan performance and extend its life span.
Tools Needed:
- Compressed air
- Soft brush
- Damp cloth
Step-by-Step Guide:
- Turn off the fan and disconnect power: Ensure the fan is turned off and, if possible, disconnect the power supply.
- Access the motor: Remove any covers or housing to expose the fan motor. If needed, refer to the fan’s manual.
- Clean with compressed air: Use compressed air to blow away dust and debris from the motor. Hold the can upright and spray in short bursts to avoid moisture buildup.
- Brush away residue: Use a soft brush to gently remove any remaining dust.
- Wipe down with a damp cloth: Carefully wipe the motor casing with a damp cloth to remove any final bits of dirt. Avoid getting any liquid inside the motor.
Inspecting Common Problems
Inspecting your ceiling fan can help you discover potential issues early. Here are a few problems to look out for:
Wobbling Blades
Wobbling blades can be caused by several factors, including uneven blade weight, loose screws, or warped blades.
Step-by-Step Guide:
- Turn off the fan: Ensure the fan is completely turned off before starting your inspection.
- Check blade screws: Use a screwdriver to tighten all the screws on the fan blades. Loose screws are a common cause of wobbling.
- Measure blade heights: Measure the distance from each blade tip to the ceiling to ensure they are even. Uneven blades can cause wobbling.
- Balance the blades: If the blades are still wobbling, use a blade balancing kit, which usually includes small adhesive weights. Attach the weights to the top of the blades to balance them, following the instructions included with the kit.
- Inspect blade condition: Check for any warped or damaged blades. Replace any blades that are not in good condition.
Unusual Noises
Unusual noises from your ceiling fan can indicate various issues, such as loose components, lack of lubrication, or worn-out parts.
Tips on Diagnosing and Fixing Noise Issues:
- Identify the noise source: Turn off the fan and manually rotate the blades to identify the noise source.
- Tighten loose parts: Check and tighten all screws and bolts on the fan and mounting bracket. Loose parts often cause rattling or clicking noises.
- Lubricate moving parts: Apply a few drops of light oil to the fan motor and other moving parts to reduce friction and noise.
- Check for worn-out parts: Inspect the fan for worn-out or damaged parts, such as bearings or bushings, and replace any parts that show signs of wear.
Loose or Damaged Parts
Loose or damaged parts can affect the performance and safety of your ceiling fan. Regular inspection helps identify and fix these issues before they become major problems.
Step-by-Step Guide:
- Turn off the fan and disconnect power: Ensure the fan is turned off and, if possible, disconnect the power supply.
- Inspect the fan: Check all visible parts of the fan, including blades, mounting bracket, and motor housing, for any signs of damage or wear.
- Tighten screws and bolts: Use a screwdriver or wrench to tighten any loose screws and bolts. Pay special attention to the screws that secure the blades and the mounting bracket.
- Replace damaged parts: If you find any broken or damaged components, refer to the fan’s manual for replacement instructions. Common replacement parts include blades, pull chains, and light fixtures.
Oiling the Fan
Oiling your ceiling fan is an essential part of its maintenance. Proper lubrication helps maintain your fan’s performance by reducing friction in the motor and bearings, which in turn prevents noise and overheating. Regular use of ceiling fan maintenance oil or other lubricants helps ensure smooth operation and extends the life span of your fan. Check the user manual for the manufacturer’s recommendations regarding oiling a ceiling fan.
Tools Needed:
- Fan oil or lightweight motor oil
- Dropper
Tips on How Often to Oil the Fan:
- Frequency: Some fans are recommended to be oiled every 6 to 12 months, while others may need an annual oiling.
- Usage-based maintenance: If you notice any unusual noise or reduced performance, it might be a sign that the fan needs oil, regardless of the schedule.
- Check manufacturer’s guidelines: Always refer to your fan’s manual for specific oiling instructions and recommendations.
Ceiling Fan Maintenance Checklist
To keep your ceiling fan running smoothly and efficiently, it's ideal to follow a routine maintenance schedule. Here is a handy ceiling fan maintenance checklist to help keep any fan in top condition:
Step-by-Step Guide:
1. Turn off the Fan:
- Always start by turning off the fan and disconnecting the power supply if possible.
2. Cleaning:
- Dust and vacuum the blades:
- Use a microfiber cloth to dust the blades regularly.
- Vacuum the blades with a brush attachment to remove stubborn dust and debris.
- Clean the motor:
- Use compressed air to blow away dust from the motor.
- Wipe the motor casing with a damp cloth.
3. Inspecting for Issues:
- Check for wobbling blades:
- Tighten all screws on the blades and ensure they are balanced.
- Use a blade balancing kit if necessary.
- Listen for unusual noises:
- Identify the source of any noise and tighten loose parts.
- Lubricate moving parts if needed.
- Inspect for loose or damaged parts:
- Check all visible parts for damage or wear.
- Tighten any loose screws and replace broken components.
4. Oiling the Fan:
- Locate the oil hole:
- Refer to your fan’s manual to find the oil hole.
- Apply ceiling fan maintenance oil:
- Use a dropper to apply a few drops of oil into the oil hole.
- Turn the blades by hand to distribute the oil.
- Frequency of maintenance:
- Perform a thorough cleaning and inspection every three to six months.
- Oil the fan every 6 to 12 months or as recommended by the manufacturer.
Home Warranty and Your Ceiling Fan
Are ceiling fans covered by a home warranty? Typically, yes. Home warranties include coverage for various household systems and appliances, including ceiling fans. This coverage means that if your ceiling fan fails due to normal wear and tear, the warranty company can repair or replace it according to the terms of your contract. To learn more about First American’s ceiling fan warranty coverage, get a free home warranty quote today.
Ensure Long-Lasting Efficiency
Regular maintenance of your ceiling fan is important for its performance, efficiency, and longevity. By following the ceiling fan maintenance tips outlined in this guide, you can keep your fan running smoothly and avoid common issues such as wobbling, noise, and overheating. Proper cleaning, inspection, and lubrication are all essential parts of a comprehensive ceiling fan maintenance routine.
We encourage homeowners to incorporate these maintenance tasks into their regular schedules to ensure their ceiling fans remain reliable and efficient. Consistent care not only extends the life of your fan but also enhances its effectiveness in providing comfort and reducing energy costs. For those considering a new fan, our ceiling fan buying guide can help you choose the best option for your home, ensuring you start with a high-quality, durable fan that will benefit from these maintenance tips.
The contents of this article are provided for general guidance only. First American Home Warranty does not assume any responsibility for losses or damages as a result of using this information.
Please be aware that if you disassemble a covered system or item, it can invalidate your home warranty or manufacturer's warranty.







Home Care Buzz Experts
The First American Home Care Buzz team is made up of experienced home warranty writers and editors. Our team provides valuable insights and information to help homeowners like you meet the daily challenges of homeownership.
This article is about...