
Replacing Paneling with Drywall: A Do-It-Yourself Guide
FEBRUARY 01, 2024 | Home Care Buzz Experts | 7 minute read
Like any design trend, wood paneling comes in and out of fashion. Tastes evolve, but once-popular styles always seem to return. That doesn't mean you should keep the shag carpet from the ‘70s, though. Outdated versions of any décor need an upgrade. If your wood paneling hasn't seen a makeover since the mid-century, it may be time to say goodbye.
How do you remove old wood paneling to modernize a room? We'll walk you through step-by-step — from supplies to the process.
Tools and Materials
The following items will be needed when removing wood paneling:
- Drop cloth
- Dust mask, safety glasses, protective gloves
- Flat bar/pry bar
- Hammer
- Joint compound
- Pliers
- Putty knife
- Sandpaper
- Utility knife
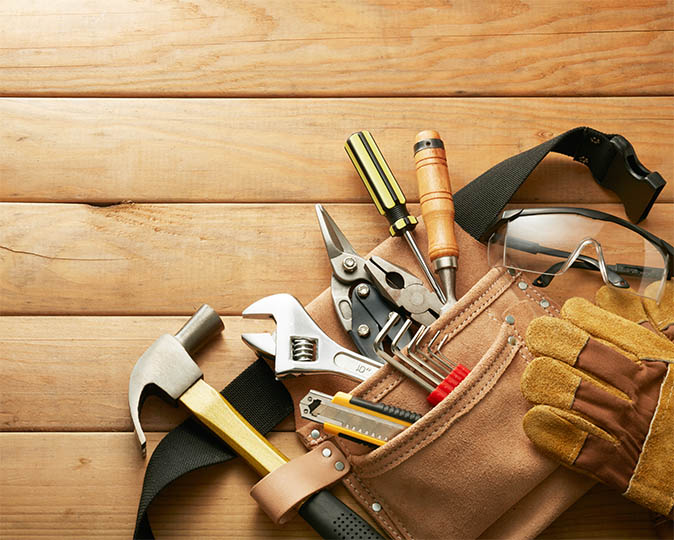
If your paneling was glued instead of nailed, you may also need:
- Adhesive remover
- Heat gun
- Oscillating multi-tool
Prep and Safety
The cost to remove wood paneling can vary, but preparing the site and planning can help. Give yourself room to work and prepare the area by removing furniture and placing a drop cloth on the floor. Wear protective gloves and safety glasses. Ensure the area is well-ventilated, especially if you're using adhesive removers. If your paneling is glued to the wall, skip ahead to the Glued-On Wood Paneling Removal section.
Nailed-On Wood Paneling Removal
Most wood paneling is secured with nails at the top, bottom, and along the studs in the middle. Before removing panel walls, you can run a magnet over the paneling to locate them — you'll feel a magnetic pull where the nails are located.
Remove Trim and Baseboards
You may need to remove the border trim, especially if you are removing wainscoting. Use the utility knife to score where the trim or baseboards meet the wall to help prevent from tearing. Then, gently use the pry bar to remove the trim.
Remove Paneling
Use the putty knife to gently pry one corner of the paneling away from the wall. Once you've created an opening, insert the pry bar and gently pull the panel out. If you need extra leverage, lightly tap the end of the pry bar with the hammer until the panel gives way. Continue to remove the panels by working the pry bar along the seams. Be patient and mindful of pry bar placement and go slowly to avoid damaging the underlying wall.
Remove Nails and Screws
Once you've removed the paneling, you will most likely see protruding nails or screws. Use the back of your hammer or a drill to remove them.
Glued-On Wood Paneling Removal
Remove Paneling
Some paneling is applied with glue, which can be more challenging to remove. Start by testing the adhesive. In an inconspicuous spot (like behind a door), attempt to pry the paneling off using the putty knife and the abovementioned method. Depending on the adhesive type and age, it might come off easily, or you may need further steps.
Use Heat
Use a heat gun or hair dryer if the paneling refuses to budge. Warming the adhesive can soften it, making removal easier. Hold the heat source close to the paneling for several seconds, then attempt to pry it off.
Use Adhesive Removal
If heat doesn't do the trick, you may need a chemical adhesive remover. There are many available at home improvement stores. Follow the manufacturer's instructions closely. Typically, you'll apply the solution, allow it to sit, and then attempt to remove the paneling.
Scrape Residual Adhesive
After the paneling is removed, you'll likely have patches of adhesive left on the wall. Using a scraper or putty knife, gently remove as much as possible. If needed, use heat or remover until the adhesive begins to budge. Be patient, as some adhesives can be stubborn.
If those methods do not work for your paneling, try an oscillating multi-tool to separate clingy glue from the wall.
Post-Panel Removal
Use the putty knife and joint compound to patch damaged areas, then once dry, sand smooth.
If the damage is extensive, you might need to install new drywall. You may also look at replacing paneling with drywall if you discover only studs behind the paneling. Or you can opt for new paneling or a different wall finish.
Priming and Painting
Wipe down the wall to remove residual adhesive, dust, or debris. If you've decided to paint, now's the time to prime. A good primer hides discoloration from old adhesives and provides a smooth surface for painting. Read more of our painting tips to learn how to transform your room after wall paneling removal.
Disposing of Old Paneling
Dispose of the old wood paneling responsibly. Check local waste guidelines to ensure you're disposing of it correctly. If it's in good condition, you can donate it or offer it to someone who might want it for projects.
Benefits of Removing Wood Paneling
Modernize the Look and Feel
Aesthetics change with time, even if modern designs reference past tastes. Current styles tend to favor lighter, brighter rooms. Even rustic wood interiors have moved beyond the panels of the past. Dark wood can make a room feel dim and small. Removing wood paneling can instantly update, lighten, and refresh a space, making it feel larger and more inviting.
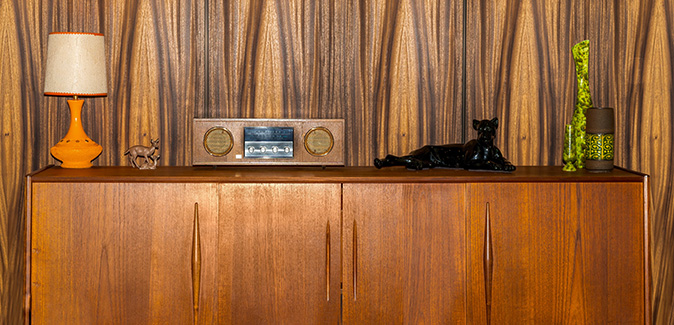
Modern living also requires new considerations like technology use. If you're looking to install new electrical outlets, switches, or built-in audio-visual systems, it might be easier to do so without wood panels.
Increase Home Value
Updated interiors can increase your home's market value. Many home buyers prefer updated interiors, and removing wood paneling that has seen better days makes the home more appealing.
Reveal Hidden Issues
Removing wood panels can expose underlying problems like mold, mildew, or structural damage. You can then address these problems before they worsen.
Once the panels are removed, you can add or update insulation, potentially leading to better energy efficiency and cost savings.
Enhance Design Flexibility
With the paneling gone, you have more options for wall finishes, from paint to wallpaper. Changing wall colors or patterns gives you more options to update the room's decor and overall aesthetic.
Common Mistakes to Avoid With Wall Panel Removal
Rushing the Process
Take your time when removing paneling from walls. Being too forceful can result in damage that is difficult and time-consuming to repair. If you want to know what to do with wood paneling, careful removal widens the options for reuse or donation.
Take time to collect and prepare the proper tools. Please ensure they're in good condition and appropriate for the task.
Not Checking Behind the Paneling First
Always gently check a section to understand what you're working with. Starting at a corner or seam, gently use the pry bar to pry away the panel. Ideally, you discover drywall, but you may find just studs requiring more extensive repair.
Skipping Safety Precautions
Protection is very important for any home improvement project. Always wear safety gear to prevent injuries and keep your plan on track. Safety glasses protect your eyes from splinters and dust. Gloves prevent splinters, cuts, and other injuries. If using solvents or other chemicals, ensure the room is well-ventilated to avoid inhaling harmful fumes.
Overlooking Electrical Outlets, Switches, or Wires
Always turn off the electricity in the room you're working in. Remove outlet covers and switch plates before starting the removal process. When prying off panels, look for hidden wires or pipes. Damaging these can lead to bigger, more expensive problems.
Not Testing for Asbestos
In older homes (pre-1980s), there's a possibility that the adhesive used to stick the wood panels might contain asbestos. If you need more clarification, it's best to test it before removing it.
Not Considering Proper Disposal
Check local regulations for proper disposal methods. Some panels, especially older ones, might contain chemicals or treatments unsuitable for regular trash pickup.
Some wood paneling can be valuable, especially if it's solid and in good condition. Before discarding, consider if it can be reused, sold, or recycled.
If you need clarification or are uncomfortable with any process step, consult or hire a professional. They'll have the experience and tools to do the job correctly and safely.
Removing wood paneling can be a significant undertaking. With patience, the right tools, and a good guide, it's a task you can tackle, much like our other DIY home improvement ideas. Whether you're dealing with nailed-on or glued-on paneling, the key is to go slowly, prioritize safety, and be prepared for some wall repair afterward. The result — a fresh, modern wall — will be worth the effort.
Once you've breathed life into your space again, get a free home warranty quote from First American to learn how we can help protect your home's systems and appliances.
FAQs about Removing Wood Paneling
Is it better to paint or remove wood paneling?
It depends on your aesthetic and aim. Some people opt to paint wood paneling to save time and money or because they prefer the look. Some panels, especially real wood, feel new with sanding and re-staining.
What if I find mold or water damage?
Address these issues immediately. Mold can be hazardous, and water damage might indicate bigger problems.
What is usually behind wood paneling?
Most often, you will find drywall behind wood paneling. Sometimes, paneling has been nailed to studs without a drywall layer, so, you will need to hang drywall after removing panel walls. This may also allow you to upgrade or add new wall insulation.
Can I DIY wall panel removal, or should I hire a pro?
You can DIY the project if you are comfortable with the tools and the process. However, if the job reveals significant damage or if you need clarification, it might be best to consult a professional.
The contents of this article are provided for general guidance only. First American Home Warranty does not assume any responsibility for losses or damages as a result of using this information.



Keep Reading




Home Care Buzz Experts
The First American Home Care Buzz team is made up of experienced home warranty writers and editors. Our team provides valuable insights and information to help homeowners like you meet the daily challenges of homeownership.
This article is about...