How to Replace a Toilet Handle Step-by-Step
SEPTEMBER 16, 2025 | Home Care Buzz Experts | 4 minute read
A broken toilet handle can keep your toilet from flushing properly or stop it from flushing at all. The good news is that it’s usually an easy and affordable fix. With just a few basic tools, you can swap out the old handle and get your toilet working again in no time.
You’ll want to make sure you choose the correct replacement and follow a few simple steps to avoid common mistakes. Here’s what to know before you get started.
Why Toilet Handles Break
Toilet handles get used multiple times a day. Over time, the internal parts inside the tank can wear out, loosen, or corrode.
You may need a replacement if:
- The handle feels loose or wobbly
- It sticks in the down position
- It won’t spring back after flushing
- The toilet won’t flush at all
- You notice cracks, rust, or mineral buildup on the hardware
If tightening the nut doesn’t help, it’s probably time to replace the toilet flush handle.
What You’ll Need
You don’t need much to learn how to replace toilet handle parts. Most jobs just require:
- Adjustable wrench or pliers
- A new toilet handle that matches your setup
- A cleaning cloth
- A bucket or towel (optional, for extra water)
How to Replace Toilet Handle Hardware in 8 Easy Steps
Step 1: Remove the Toilet Tank Lid
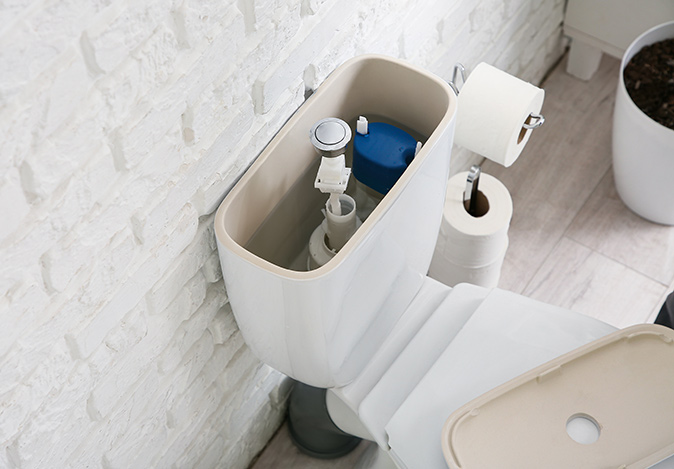
Lift the lid off your toilet tank and set it aside somewhere safe. It’s usually ceramic and can break when dropped.
Step 2: Shut Off the Water (Optional)
It’s usually safe to leave the water on, but if you’d prefer, you can turn off the supply valve behind the toilet and flush once to empty the tank.
Step 3: Unhook the Lift Chain
Inside the tank, you’ll see a small chain that connects the handle to the flapper. Unhook the chain from the end of the handle arm. Take note of where it’s attached so you can reconnect it later.
Step 4: Loosen the Mounting Nut
Use your wrench or pliers to loosen the nut holding the handle in place. Most toilet handle nuts are left-hand threaded, meaning you turn them clockwise to loosen. Hold the handle steady from the outside while loosening the nut from inside the tank.
Step 5: Clean the Area
Wipe down the area where the old handle was installed. Rust and mineral buildup can prevent the new handle from sitting properly.
Step 6: Install the New Handle
Slide the new handle through the hole from the outside of the tank. From inside, screw on the new mounting nut and tighten it counterclockwise. Don’t overtighten. You want it to be snug, not cracked.
Step 7: Reconnect the Lift Chain
Attach the chain to one of the holes near the end of the new arm. There should be just a little slack when the flapper is closed. The toilet may not flush correctly if it’s too tight or loose.
Step 8: Test the Flush
Replace the tank lid and turn the water back on if you shut it off. Flush the toilet and make sure everything moves smoothly. If it doesn't flush properly, check the chain and handle alignment.
Tips for Choosing the Right Handle
Toilet handles aren’t all the same. Here’s what to look for when buying a new one:
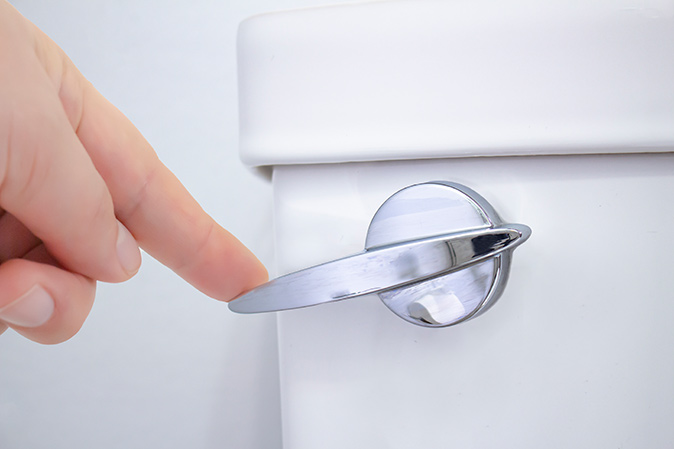
- Mounting position: Handles come in front, side, or angled versions. Match the style of your current setup.
- Finish: Handles in chrome, bronze, white, and more. Choose one that fits your bathroom design.
- Universal vs. brand-specific: Some handles are designed for specific toilet brands, while others are more universal across brands.
If your toilet has a unique design or you're dealing with an older model, it may take a bit more research to find the right replacement handle. Some toilets use specialty parts that aren’t available at every hardware store. In those cases, check the brand name and model number inside the tank, or visit the manufacturer’s website for compatible options. You can also contact the toilet brand’s customer support for help finding the correct part. Making sure you get a handle that fits well will save you time and frustration during installation.
When to Call a Plumber
If you’ve replaced the handle and the toilet still isn’t flushing correctly, the issue might go beyond the handle. You may want to contact a plumber if:
- The chain keeps slipping or breaking
- The flush valve or flapper is damaged
- The tank isn’t filling with water
- There’s visible damage inside the tank
Sometimes the handle fix is just one part of the bigger picture.
Can a Home Warranty Help With Plumbing Repairs?
Changing the toilet flush handle is an easy fix, but other plumbing problems can be more complex and expensive. A home warranty from First American can help cover repairs related to your home’s plumbing system, including supply lines, shutoff valves, and toilets, when they break due to normal wear and tear.
It’s a good idea to review your coverage or get a quote if you're not already protected.
Fix It Fast and Flush With Confidence
Now that you know how to replace a toilet handle, you can take care of one of the most common toilet repairs yourself. All it takes is a little time, basic tools, and the right replacement part.
Want added protection for the plumbing in your home?
Get a free quote today and see how First American Home Warranty can help take care of covered plumbing issues when they happen.
The contents of this article are provided for general guidance only. First American Home Warranty does not assume any responsibility for losses or damages as a result of using this information.
Please be aware that if you disassemble a covered system or item, it can invalidate your home warranty or manufacturer's warranty.




Keep Reading