How to Clean Your Dryer and Keep It Fresh
OCTOBER 23, 2025 | Home Care Buzz Experts | 4 minute read
Most homeowners know they should clean their dryer’s lint screen often, but that’s only part of dryer care. To keep your appliance safe and your laundry fresh, it’s important to know when it’s time to go beyond lint removal and do a deep cleaning, including sanitizing the drum.
When it comes to learning how to clean a dryer and keep it clean, establishing a simple routine is essential. It can go a long way toward helping your laundry dry faster, preventing odors, and reducing appliance safety risks. In this guide, we’ll show you how to clean a dryer step-by-step and share easy ways to sanitize it.
How Often Should You Clean Your Dryer?
Cleaning your dryer regularly helps improve its safety and efficiency. Lint buildup and hidden dust can slow performance and increase fire risks if ignored. Here’s a schedule to follow:
- After every load: Clear lint from the screen
- Monthly: Vacuum around the lint trap and wipe down the drum
- Every three to six months: Clean the vent and ductwork to keep air flowing
- As needed: Sanitize the drum, especially after drying gym clothes, bedding, or items exposed to illness
If your clothes take longer to dry, feel unusually hot, or smell musty, that’s your cue that it’s time for a deeper clean.
How to Clean a Dryer: Step-by-Step Guide
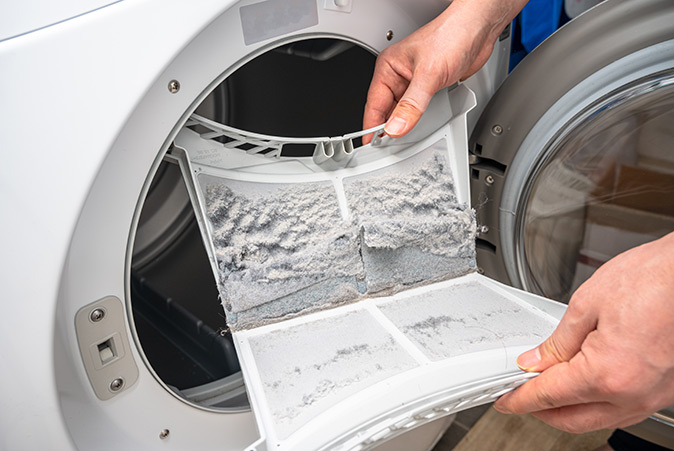
Regular lint removal after each load is essential. You should pull out the lint screen after each cycle and remove all the lint by hand. However, your dryer often needs more thorough cleaning. Here’s what to do as part of your monthly deep clean (beyond routine lint removal) to ensure your dryer is clean and fresh:
1. Clean the Lint Screen
- Once a month, rinse the screen with warm, soapy water to remove residue from dryer sheets or fabric softener.
- Let it air-dry before reinserting it.
2. Clear the Lint Trap
- Use a vacuum attachment or a lint brush to reach inside the lint trap area (where the lint screen sits).
- Remove any buildup that may restrict airflow.
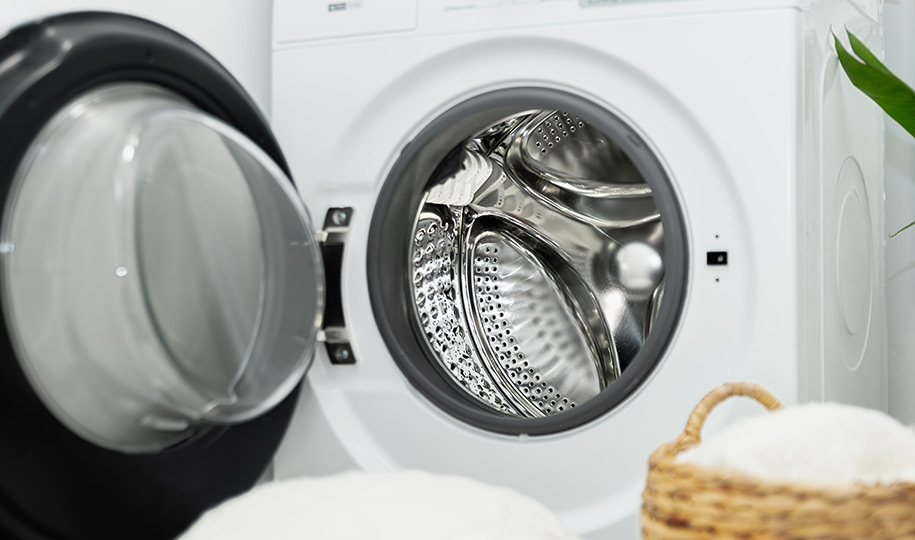
3. Wipe the Drum
- Dampen a soft cloth with a mix of mild soap and water.
- Wipe down the inside of the drum to remove residue.
- For sticky spots, use a paste made from a mixture of baking soda and water (approximately three parts baking soda to one part water), then wipe clean.
4. Clean Around the Seal
- Open the door and inspect the rubber gasket or seal.
- Wipe it with a damp cloth to remove lint, dirt, and residue.
5. Vacuum Behind and Under the Dryer
- Unplug the dryer.
- Carefully pull it away from the wall.
- Use a vacuum to clear dust from the floor, back of the unit, and surrounding area.
6. Clean the Dryer Vent
- Disconnect the duct from the back of the dryer.
- Use a vacuum or vent brush to remove lint from the vent duct and opening.
- Reattach the duct securely.
7. Check the Moisture Sensor
- Look for two thin metal strips inside the drum.
- Gently wipe them with a soft cloth and a small amount of rubbing alcohol.
Cleaning these sensors helps your dryer stop at the right time.
8. Inspect the Exhaust Hood Outside
- Locate the vent flap where your dryer duct exits your home.
- Make sure the flap opens and closes easily.
- Remove any lint, leaves, or debris blocking airflow.
9. Wipe the Control Panel and Accessories
- Dust the dryer’s front control panel and knobs with a dry microfiber cloth.
- Wash any removable racks or accessories with warm, soapy water.
- Let them dry thoroughly before reinserting them.
How to Sanitize a Dryer
Sometimes cleaning isn’t enough — you may also want to disinfect. Learning how to sanitize a dryer is simple and beneficial if someone in your home has been sick or if you’ve dried items like gym clothes or pet bedding. Sanitizing helps remove germs and odors that regular cleaning might not.
Here’s how:
- Mix equal parts white vinegar and water in a spray bottle.
- Lightly spray the inside of the drum.
- Wipe with a microfiber cloth and let it air-dry.
For added freshness, run the dryer on a high heat cycle for 10 minutes with a damp cloth inside. Heat helps kill bacteria and leaves the drum ready for your next load.
A regular cleaning and sanitizing schedule helps keep your dryer working more efficiently and prolongs its lifespan. It helps prevent odors from spreading to your clothes, makes each cycle more efficient, and reduces the risk of lint-related fires. The time you spend on dryer care pays off in safer, fresher laundry.
When to Call for Help
Even with good upkeep, dryers will sometimes need service. If you’ve cleaned and sanitized but still notice unpleasant smells, loud noises, or damp laundry, it may be time to call in a professional.
A home warranty from First American can help you manage the cost of repairs or even a replacement when your covered dryer breaks. With a quick service request online or via phone, we’ll assign a prescreened technician. The technician will schedule an appointment with you, during which they will diagnose the problem and make the covered repair or replacement of your broken dryer.
Keep Your Dryer Clean and Safe
Now that you know how often to clean your dryer and how to sanitize it, you can add these quick tasks into your home maintenance routine. With a bit of care, you’ll enjoy fresher laundry, better efficiency, and greater peace of mind.
A First American home warranty can help protect your budget and give you the comfort of knowing you’re not alone when your dryer breaks. And when bigger issues come up, a home warranty can also help with those. Besides dryers, our home warranties cover many major appliances and systems you use every day to help your household run smoothly, such as dishwashers, ovens/ranges/cooktops, HVAC, plumbing, and more.
Get a free quote today to explore your options and learn more about our coverage and benefits.
The contents of this article are provided for general guidance only. First American Home Warranty does not assume any responsibility for losses or damages as a result of using this information.
Please be aware that if you disassemble a covered system or appliance, it can invalidate your home warranty or manufacturer's warranty.




Keep Reading